Everything about repotting a spider plant
Spider plants grow really quickly and need to repotted quite frequently compared to other plants. It's complicated, but there are a few good things to know before you do this. In this guide, we'll go over everything you should be mindful of when repotting spider plants.
These sprouts will grow quickly and will need to be repotted.

In this guide, I'll explain when you can start to repot a spider plant, and what kind of pot you should look for when you're ready to give your spider plant a new space to grow.
These are the topics we're going to look at:
Let's get started!
How can you tell if a spider plant needs to be repotted?
To repot the spider plant, you'll need to wait until its roots are ready for this change. This means that you need to wait until the roots start to circle the bottom of the pot and can keep most, if not all, of its soil together by itself.
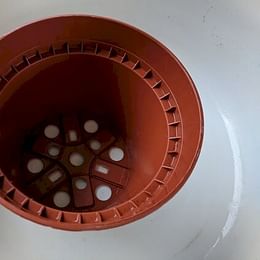
To better demonstrate this, have a look at the picture below. This is the absolute minimum amount of roots you need to repot the spider plant.

As you can see, the roots have made its way around the bottom of the pot and it can keep all of its soil in place. This is the minimum amount of roots you should be able to see to repot your plant.
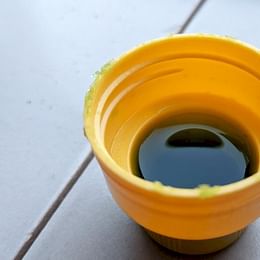
Another trick to see if there are potentially enough roots is by checking the bottom of the pot. If you use pots with drainage holes in the bottom, the roots will make their way out of the pot and the roots will start to grow out. This is a very good sign. This usually means there is no more space for the spider plant to grow inside of the pot, so it's trying to expand its boundaries.
When this happens, be sure to lift the plant out of the container and check if the roots have gone all the way around the bottom of the pot. If the roots are ready, it's time to look for a bigger pot.
When is the best time to repot a spider plant?
As we've already learned, you should wait until the plant is rootbound before you repot it. However, it's also important to repot your plant during the right time of year: spring and summer. During this time, the plant grows quickly and can settle into its new growing environment much more quickly than in the fall or winter.
What kind of new pot do you look for?
At the beginning of this guide, I mentioned the spider plant loves to be root bound, this should be your first clue for the size of the new pot. Get a pot that's just slightly bigger than the pot it's currently in. There is no use in getting a pot that's bigger than that. The spider plant is happiest when it can take over the space of the soil with roots.
The plant loves to take over the entire pot as quickly as possible. If you only have bigger pots, that's also okay, but you'll need to help your plant to grow more quickly by fertilizing it. Make sure the pot is not much larger than the current pot, but 2 sizes larger should be okay.
The style of pot you want to start using for your spider plant is really up to you, but it's easiest if you get a pot with drainage holes. The drainage holes allow the excess water to escape the pot, so there is less risk of root rot. The drainage hole is not necessary, so if you have a beautiful pot you want to use for your spider plant, go for it. The only thing you have to be mindful of is being a bit more careful when watering your plant.

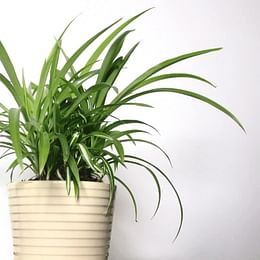
This pot contains 5 different spider plants. Because there are 5 separate plants in there, they should take over the pot quite quickly, which is exactly what we're looking for.
Restricted space promotes growth for a spider plant. If you don't want to repot your spider plant any time soon, you can leave them in the new pot and not repot it again. At some point, the plant won't grow anymore and maintain its current size. You can read more about this in my How to care for a spider plant guide.
The results of a happy spider plant
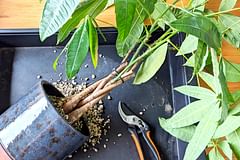
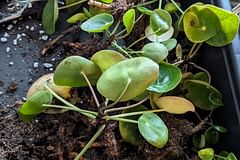
When the spider plant has established itself in a properly sized pot and has taken over a lot of space in the pot, it will start to grow little sprouts itself. This is very exciting because the previously tiny plant is now growing its tiny plants. In the picture below you can see what I discovered on one of my small spider plants just very recently.

It has started to grow its first sprouts. If you follow these guides, you'll start to learn exactly what your spider plants are like and how to best take care of them. This is just the start and soon you'll be able to see your sprouts making their own plants.
How frequently should you repot a spider plant?
Once you've repotted the spider plant successfully, you won't need to repot it again very soon. The ideal situation is to repot your plant every two or three years if the roots become rootbound. This will give the plant plenty of time to take advantage of its comfortable environment and settle in.
If the pot is too large, it can lead to root rot, so be sure to not repot unless you have to.
Thank you for reading this post! I hope it helps you to keep your plants healthy and beautiful! If you're looking for more guides on specific plants, you can always request a plant guide to get a guide for the plant you have trouble with.
Test your plant care knowledge
Quiz completed!
Want to learn more? Sign up for my newsletter to receive free tips in your inbox!
Sign up now!