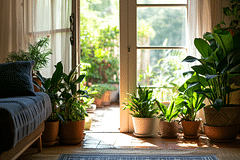
How to repot a Pachira Aquatica (Money tree)
Discover how to repot your Money Tree (Pachira Aquatica) with this easy-to-follow guide. Learn the essential tools and steps for successful repotting, along with aftercare tips to ensure your plant's health and growth.

Repotting your Money tree is a simple yet impactful task that can significantly enhance the overall health and growth of your plant. By following this step-by-step guide, you'll learn the essentials of repotting and discover the necessary tools to ensure your Money tree thrives in its new home. Get ready to give your beloved plant the care it deserves with these expert tips.
Let's get started by looking at which tools you'll need to repot your Pachira Aquatica.
Tools Needed

To repot your Pachira Aquatica, you'll need a few tools. Some of these tools are completely optional but can make the process go by a little more smoothly. Let's have a look!
A new pot
A new pot is an obvious tool you'll need when repotting a houseplant. But did you know the size of the pot makes a big difference? Choose one that is 1-2 inches larger in diameter than the current pot to give your plant room to grow. Make sure it has good drainage holes. This will prevent any watering issues.
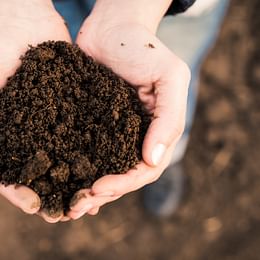
Potting soil
You'll need extra potting soil because you're moving the plant into a larger pot. That means you'll need more soil. A well-draining potting mix is ideal. You can use general-purpose potting soil or a mix designed for general houseplants, as Money trees prefer similar conditions.
Ideally, the soil should contain a general potting mix, some perlite, and coconut fibers. This keeps the soil light and airy, giving the plant's roots plenty of space to grow.
Scissors or pruning shears

Scissors or pruning shears might seem like an odd tool to need for repotting a plant, but it's very useful. When you repot your plant, you get the unique opportunity to inspect your plant's roots. This is the best time to trim any dead or rotting roots.
Before using the scissors, make sure to sterilize them with some rubbing alcohol. This prevents any pests and diseases from spreading between your plants.
Watering can
After repotting your plant, you'll need to water your plant to help the soil settle. So prepare a watering can and set it aside for later.
(Optional) Trowel & gloves
If you're like me, you don't mind getting your hands dirty when repotting your plant. But that's not for everyone, and that's okay! If you prefer to keep your hands clean, grab a small trowel and gardening gloves and use them while handling the plant and the soil.
Steps to Repot Your Money Tree
Now that we have all the tools ready, let's look at the steps you need to take to repot your Pachira Aquatica. The first station is preparing the new pot. Let's get started!
Prepare the new pot
 Place a layer of fresh potting soil at the bottom of the new pot. This guarantees that the roots have immediate access to nutrients and helps with drainage.
If you're worried about soil falling out of the drainage hole, you can place a rock or a piece of mesh over the whole to catch any loose soil. You can also get a repotting tray that catches any soil while you're repotting your plant.
I love my repotting tray and don't know how I've done without it for all those years!
Remove the Money tree from its current pot
Gently hold the base of the plant and tip the pot sideways, easing the plant out. You might need to tap the pot's edges or squeeze the sides (if it's flexible) to help release the plant.
If you're having trouble removing the pot gently, you can also hold onto the base of the plant well and give one hard hit with your hand on the side of the pot downwards. This will most likely cause a bit of root damage, but your plant will instantly be loose from the pot.
Inspect and trim the roots
Once out of the pot, check the root ball for any signs of disease or rot (brown or mushy roots). Use your scissors or pruning shears to trim away any unhealthy roots. If the roots are extremely tangled or pot-bound, gently tease them apart with your fingers.
Remove any dead or rotting roots, but try not to prune more than 1/3 of the total root ball. If you trim any more (healthy) roots, it can be more difficult for the plant to recover from being repotted.
Place the plant in the new pot
 Hold the Money tree in the center of the new pot, and add potting soil around the roots until it is securely in place. Make sure that the soil level is the same as it was in the previous pot, avoiding burying the stem too deep as this can lead to rot.
Ideally, the soil level stays about 2 cm (about an inch) under the edge of the pot. This makes it easier to water your plant because the water won't be able to just run out of the pot before it gets absorbed by the soil.
It's a good idea to gently press down on the soil around the plant. This helps to remove air pockets from the soil, so water won't get stuck in them.
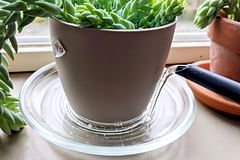
Water your Money tree
After repotting, water the plant thoroughly. This helps settle the soil around the roots and helps to further eliminate air pockets. Allow the excess water to drain away through the drainage hole completely.
Aftercare

Place the repotted Money tree in a location where it receives bright, indirect light. In this spot, your plant will have the best chance of healing and adjusting to its new home.
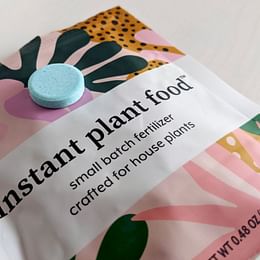
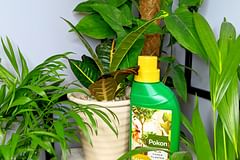
If you've bought a bag of potting soil from a gardening store, you won't have to think about fertilizing your plant for the first 3 months, as the manufacturer usually adds fertilizer to the soil.
If you've mixed your own potting soil, wait with fertilizing for at least 2-4 weeks to allow the plant's roots to heal and adjust.
Last minute tips
Before I let you repot your Pachira Aquatica, I want to mention a few tips that will help you through the process and put your mind at ease.
- Repotting is best done in the spring or early summer when the Money tree is in its active growing phase.
- Be gentle throughout the process to minimize stress and damage to the plant.
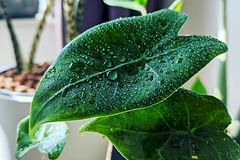
- After repotting, it's normal for the plant to take a week or two to adjust. You might notice some drooping or yellowing leaves, but the plant should recover with proper care.
If you see any drooping or yellowing leaves, don't panic. The worst thing to do is to water your plant, repot it again, or handle it in any other way. These are simply signs that your plant is stressed and it'll need time to adjust. If you were to handle the plant during this time, you would only stress it out more. Trust the process and let it be for a few weeks.
Thank you for reading this post! I hope it helps you to keep your plants healthy and beautiful! If you're looking for more guides on specific plants, you can always request a plant guide to get a guide for the plant you have trouble with.
Test your plant care knowledge
Quiz completed!
Want to learn more? Sign up for my newsletter to receive free tips in your inbox!
Sign up now!