Repotting a Pilea that's VERY rootbound!
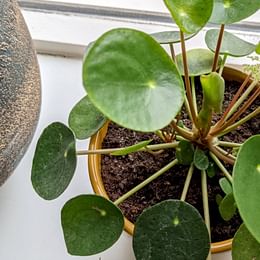
In this video, I'm showing you how I repot a Pilea Peperomioides that's VERY root bound! I've not repotted this plant in 2 years, and it shows! The soil is very compacted, the plant is very root bound and its leaves are starting to yellow because of it.
Follow along
If you want to follow along with a plant other than a Pilea, you totally can. These tips are relevant for all other houseplants.
Transcription
| Time | Script |
|---|---|
| 00:00:00 | Hello! Welcome back for another video! In this video, I'm going to repot this pilea because as you can see it's not doing super well. |
| 00:00:07 | There are a few reasons for that. Obviously it's... |
| 00:00:10 | very overcrowded so that doesn't help. But, also the soil is very compacted so |
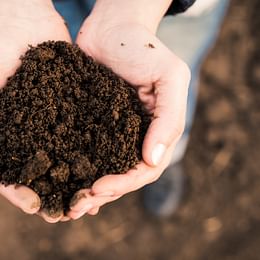
| 00:00:17 | to help with this process, I'm going to mix some soil. |
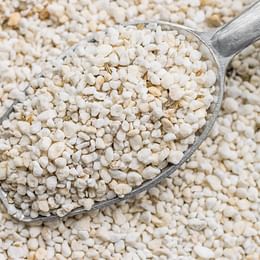
| 00:00:23 | I have some perlite |
| 00:00:26 | and I have some soil |
| 00:00:29 | just normal houseplant potting soil |
| 00:00:33 | The ratios are roughly one part perlite and two parts soil. This is pretty mixed already but in the end it's going to look like this. |
| 00:00:44 | You can see it's very porous, it's very light, it's very fluffy |
| 00:00:48 | And that's because |
| 00:00:50 | Let's see if I can show you |
| 00:00:53 | This soil in here is |
| 00:00:55 | Rock hard |
| 00:00:58 | It doesn't let through any water, so the water basically goes on the side |
| 00:01:02 | It doesn't actually absorb in the soil so that's why it looks like it's very dry. Because all the water is instantly going to the bottom of the pot |
| 00:01:12 | So first of all, let's take it out of the pot and now we'll take it out of the plastic pot. It's very it's very root bound. |
| 00:01:22 | You can barely squeeze it |
| 00:01:25 | It's not coming out either so I'm just gonna squeeze it rotate a little bit |
| 00:01:30 | I have this |
| 00:01:33 | what is it called, just like this plastic thing under it so it doesn't drip all over the floor and there's no soil to clean up. It catches it all. |
| 00:01:42 | Carefully pull on the stem, the main stem in the middle. |
| 00:01:47 | Still not letting go, even though you can see it's not really coming through... |
| 00:01:52 | the bottom yet. |
| 00:01:54 | This is just a bit of soil, it's not really any roots. |
| 00:01:58 | But if you squeeze it right now it feels... oh yep there we go yeah there you go, see! |
| 00:02:04 | Incredibly root bound |
| 00:02:08 | Hey |
| 00:02:09 | Try to show you |
| 00:02:11 | You can see |
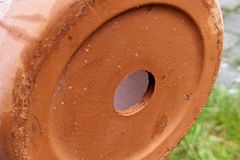
| 00:02:13 | All the imprints of the of the pot that it was in. As you can see it has little indents and you can also see those here. So this thing is incredibly root bound and that's why it has a yellow leaves as well, because it doesn't have any space to grow |
| 00:02:26 | So |
| 00:02:28 | To repot we need a new pot |
| 00:02:30 | This new pot should be just one size bigger than this. In another video I'll show you why that is |
| 00:02:38 | But for now just follow that |
| 00:02:41 | It's going to be one size bigger than this |
| 00:02:44 | So let's get that! Here we got a pot that's slightly bigger than the previous one. You know those plastic things that your plants come in when you buy them from the store? Like these! Yeah, don't throw those away! They're super useful to keep plans in because they have built in drainage holes as you can see. |
| 00:03:01 | See, there you go! And that helps to get the water away from the plants. |
| 00:03:08 | First, we're going to have to |
| 00:03:11 | Separate all of the little baby plants that are in here because there is like at least 20 plans in here, that's too many. |
| 00:03:18 | Ideally you want to have maximum three in here. The only problem is at this plant grows very quickly, so you basically have to repot it once a year. |
| 00:03:28 | But first, let's separate them. |
| 00:03:31 | That we have one big main plans and that's going to be in the new pots and the smaller plants will have their own pot. To help with that I have a little |
| 00:03:40 | pair of pruning shears |
| 00:03:42 | They are mainly used to cut off the small plants from the parent plant |
| 00:03:46 | Let's put this way for now. |
| 00:03:50 | And first separate this plant because this is, this is incredibly root bound. I've clearly not done this in two years. |
| 00:04:01 | There we go that's one plant |
| 00:04:03 | Let's try to show you. It's separated from the parent plant so this one can go into its own pot. |
| 00:04:10 | We'll put those to the side for now |
| 00:04:14 | If roots fall off like this |
| 00:04:17 | That's not too terrible as you can see this Roots system is really bad or sorry really big |
| 00:04:25 | So if one or two fall off that's fine |
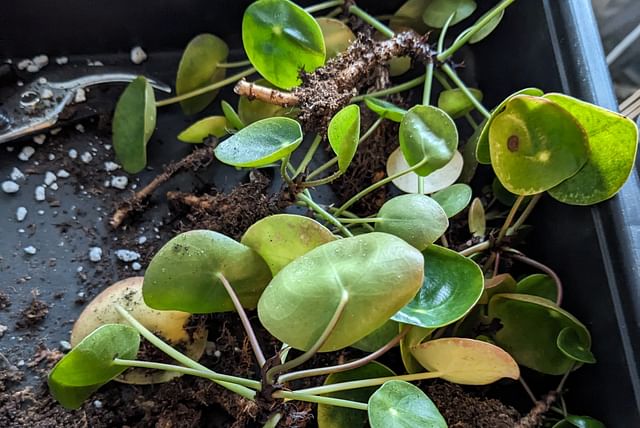
| 00:04:44 | Okay so as you can see this is basically the whole bottom of the roots system |
| 00:04:50 | That's kind of a lot to get rid of of this plant. However I'm not to worry about it because this plant is a, well it grows like a succulent, so you can basically |
| 00:05:01 | Cut off most of these things and it will still grow. So I'm just gonna get rid of this because it takes up too much space in the pot anyway. And now the root system is a lot smaller, as you can see here. |
| 00:05:11 | There's still a couple to remove, so let's do that. |
| 00:05:16 | So at this point, I've separated all of the small plants that are very easy to separate. So these are all pretty well attached, these are all growing from the parents root system. |
| 00:05:29 | So now it's kind of scary what you have to do, you have to break them off the parents. So let's let's do that. |
| 00:05:40 | See that's one. You can see this was separated from the parent plant. |
| 00:05:46 | It's a big root but |
| 00:05:48 | It's its own plant and it has its own root system now, so it will survive. |
| 00:05:54 | So you can see there's one left here. |
| 00:05:57 | I'm going to leave that on there. It doesn't have its own root system yet, it's still growing from the parents so I'm gonna leave it on there. |
| 00:06:05 | Plus, it's okay to have a couple of plants in the same pot, just not as many as you can see here. You can't see that actually, but here, let me try to show you, there is a lot, there are a lot of them. |
| 00:06:20 | Okay so this is going to go in its own pot. Let's also remove some of the yellow leaves. These will not turn green agai, so it's okay to remove them. |
| 00:06:31 | They come off very easily. It's a very sensitive plant when it comes to that. |
| 00:06:38 | Yeah so I think this looks good |
| 00:06:40 | I could probably remove these as well but it's okay for now. |
| 00:06:45 | They're very elongated I'll leave them on there for now. |
| 00:06:50 | So let's pot them up |
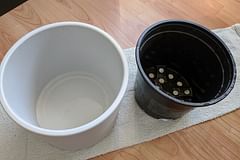
| 00:06:52 | The pot so much we have the little plastic plant with the drain holes this will be placed inside |
| 00:07:00 | Of the main pot |
| 00:07:02 | This will not hold water. That's exactly what we want, because all the water should drain through the soil, through the drainage holes, into the bigger pot. |
| 00:07:11 | We have the bigger pot that doesn't have any drainage holes. |
| 00:07:13 | That's fine too because I don't want a mess. |
| 00:07:17 | You could have this on top of a saucer and still catch all the water, but I don't like the look of these pots too much, so that's why I place them inside of nice decorative pots. |
| 00:07:26 | So let's make some of the soil remember 1/3 perlite and 2/3 houseplant potting soil. It's very important to use houseplant potting soil. |
| 00:07:35 | And that is because it's already mixed with some some stuff like... |
| 00:07:39 | I'll try to show you |
| 00:07:42 | But it's already mixed up |
| 00:07:44 | It has some |
| 00:07:46 | Ingredients that help it drain a little bit better |
| 00:07:49 | That's a tiny one! |
| 00:07:53 | Let's first place a base layer, because we don't want the roots to be all the way at the bottom. |
| 00:08:00 | I want them to sit on a little bit of a base layer. That way it can still spread out the roots a little bit better to the bottom and to the sides of the pot. |
| 00:08:25 | Okay so add a base layer |
| 00:08:28 | So about |
| 00:08:29 | This much into the pot, so it's about an inch. |
| 00:08:33 | You place this on top |
| 00:08:36 | As you can see the root system |
| 00:08:39 | Is just under the |
| 00:08:43 | Lid |
| 00:08:45 | Just under the top of the pot here |
| 00:08:48 | And that helps with watering, because then the water doesn't flow over the sides of the pot but rather stays inside of the pot |
| 00:08:55 | Also since these leaves are very sensitive they will fall off at some point |
| 00:09:00 | That's okay just |
| 00:09:02 | Try to be careful |
| 00:09:09 | I added some soil straight from the bucket into here |
| 00:09:13 | Obviously that was from one side, so now we have to spread it out in the pot a little bit. And make sure to press down on it too, because that makes sure that the plant is stable in the spot. Otherwise, it will just start swinging and we don't want that. |
| 00:09:28 | So push down on the soil and that's lots of perlite so it will have lots of nice drainage add it into it. |
| 00:09:40 | Okay it looks like I need a bit more, so I'm gonna mix up a bit more here. |
| 00:09:47 | It's a bit difficult to show you, but I've added the soil in here, I've added the perlite here, and now I'm going to mix it around. |
| 00:09:56 | And what we end up with is a nice mix |
| 00:10:06 | So what I mentioned about the top of the pot earlier, I'll show you, as you can see the soil level is lower than |
| 00:10:14 | The edge of the pot here |
| 00:10:17 | So that helps when you're watering. Your watering basically on top of the soil but it will tend to go to the outside, since dry soil absorbs water very poorly. |
| 00:10:28 | So it will tend to go to the side. So if you have it all the way up to the top |
| 00:10:32 | Like that, it's going to go over. So then you're not actually watering your plants, you're basically just watering your pot. |
| 00:10:39 | And by having |
| 00:10:42 | The top of the pot here higher than the soil, it will trap the water, the water will go down in the pot |
| 00:10:48 | And it will slowly be absorbed by the soil. And when the soil is already wet, it's much better at absorbing more water. |
| 00:10:57 | So now we've put it up the main plant with |
| 00:11:01 | One plant on the side here |
| 00:11:04 | In a bigger pot. So now it has plenty of space to grow again. |
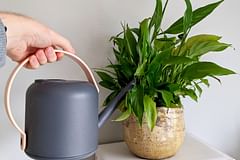
| 00:11:08 | Now we'll have to do is water it. |
| 00:11:10 | So let's put it in this pot. |
| 00:11:15 | A nice pot, without any drainage holes you can see. Let's put that in there |
| 00:11:23 | It scrapes a little |
| 00:11:26 | There we go! It's all potted up now and we're going to water it. |
| 00:11:30 | Got the plant |
| 00:11:34 | Got the water, let's water it. |
| 00:11:38 | Oh yeah |
| 00:11:41 | let me show you quickly |
| 00:11:44 | See it's not draining right away. It's because the soil is dry. This is very slowly, because it has perlite very slowly going down and now it will all be settling around the plant. So all air pockets will be filled up. The water kind of helps to compact the soil a little bit |
| 00:12:01 | Not too much obviously because then we have what we had before |
| 00:12:05 | But now it's all... |
| 00:12:07 | basically connecting it up. So if you have soil... |
| 00:12:11 | If you have the soil that touches |
| 00:12:13 | Other soil particles and it goes down to the bottom it absorbs it very gradually. |
| 00:12:18 | And that's also why you don't want gravel at the bottom of the pot for example. |
| 00:12:24 | The soil is a very good job of draining by itself, but since we added the perlite, it keeps a nice texture, it stays light |
| 00:12:33 | The previous batch as you can see |
| 00:12:37 | Did not have any perlite at all |
| 00:12:39 | That's why it compacted over time and this will do the same but it will take one or two years probably. |
| 00:12:49 | A bit of extra water since now it's a little bit more moist to soil so now it should absorb it more easily. |
| 00:13:03 | It's a bit difficult but.. |
| 00:13:07 | It's staying on the top of a little bit less now |
| 00:13:12 | Yep that's how you repot this plant |
| 00:13:14 | Now all this left for me, is to repot all of these, but I'm not gonna bore you with that. So I hope you learned something. |
| 00:13:23 | If you notice the same on any of your houseplants, not just this plant obviously... |
| 00:13:28 | Maybe it's time to repot it. Maybe it is as root bound as it is here, but it doesn't actually show it through the pot. Because for this one, the roots didn't grow out of the drainage holes either. |
| 00:13:37 | But you can see that the soil was super compacted, it was very unhappy, because of all the yellow leaves. |
| 00:13:44 | So if you notice the same on your plants, perhaps it's time to repot. |
| 00:13:48 | So yeah, I hope you learned something and I'll see you next video. |
Thank you for reading this post! I hope it helps you to keep your plants healthy and beautiful! If you're looking for more guides on specific plants, you can always request a plant guide to get a guide for the plant you have trouble with.
Test your plant care knowledge
Quiz completed!
Want to learn more? Sign up for my newsletter to receive free tips in your inbox!
Sign up now!