Everything you should know about drainage holes in plant pots
Drainage holes can be quite confusing for a lot of beginning plant owners, because all plants need a drainage hole right?! In this plant care guide, we're going to look at everything you need to know about drainage holes and how you can use the different pots with your plants.
Should you get a pot with drainage holes or should you get one that doesn't have any drainage holes? Do all plants need a pot with drainage holes or can you also get that amazing pot that doesn't have any? Drainage holes can be quite confusing for a lot of beginning plant owners, because all plants need a drainage hole right?!
In this plant care guide, we're going to look at everything you need to know about drainage holes. At the end of this guide, you'll know exactly how to use the two different types of pots for your houseplants.
There are a few things that we're going to look at in this plant care guide:
- What are drainage holes in pots for?
- How can I grow plants in a pot without drainage holes?
- Add base layer of non-organic material to your pot
- Use the plastic pot with holes your plant came in as a raised bottom
- Mix some coarse materials in with the soil
- Common mistakes made with pots without drainage holes
- How to choose the right pot with drainage holes?
- How can you cover drainage holes in pots?
- Which plants need a pot with drainage holes?
- Is one drainage hole enough?
- Signs of poor drainage or over watering
- How can you tell if you are watering too much or too little?
- How do you remove excess water from the pot?
- How do self-watering pots work?
- How do you water plants in pots with drainage holes?
- When to repot plants based on drainage issues?
- Good drainage means healthy soil
- Conclusion
Let's explore the world of pots and drainage holes and find out how you can give your plants the best fitting pot!
What are drainage holes in pots for?
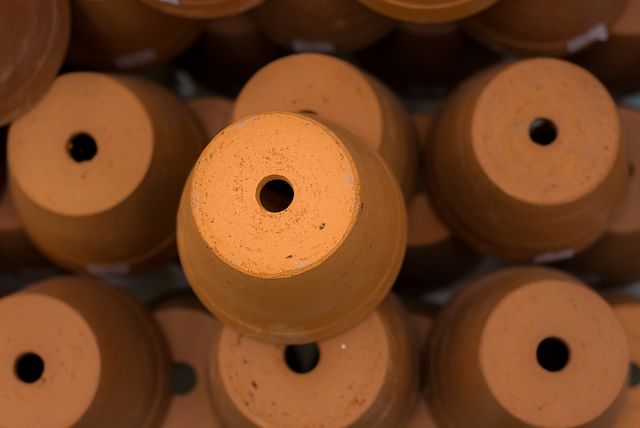
Drainage holes have that name for a great reason, because they are there to drain any excess water from the pot. When you water your plants, the soil absorbs all the moisture it can and the rest of it will sink to the bottom of the pot. This is where the drainage hole(s) at the bottom of the pot come in: This extra moisture drips out of the pot.
This drainage hole is very important for the health of your plant. When the moisture can't escape the pot and stays at the bottom, it could harm your plant in several ways. It could cause your plant to be over watered. The soil has already absorbed the moisture it needs to water your plant properly, but there is still extra moisture left behind. If the soil doesn't dry out quickly enough, this will over water your plant.
When it has over watered your plant, it could get worse, because now your plant is at risk of getting root rot. The drainage hole at the bottom of your pot prevents all of these bad things and helps your plant stay healthy.
So drainage holes are essential for your plant's health, so why are there pots without drainage holes? Let's look at that and also go into how you can still use these pots to grow your plants.
How can I grow plants in a pot without drainage holes?
Drainage holes are very important, but that doesn't mean you can't use pots that don't have drainage holes. You can still use those pots, but you'll have to take an extra step to help your plant stay healthy.
There are 3 things you can do to prevent over watering and root rot in pots without a drainage hole:
- Add base layer of non-organic material to your pot
- Use the plastic pot with holes your plant came in as a raised bottom
- Mix in some coarse materials, like perlite or sand, with your potting soil.
Let's look at these ways quickly, as they're an easy way to use those pots without drainage holes, while keeping your plants happy.
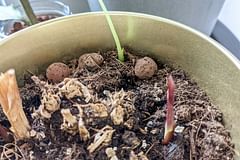
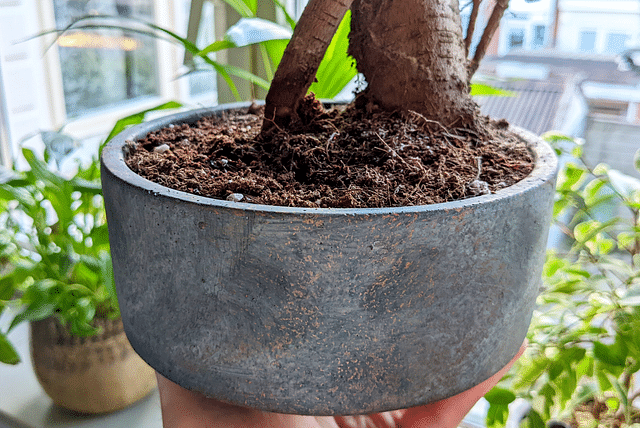
Add base layer of non-organic material to your pot
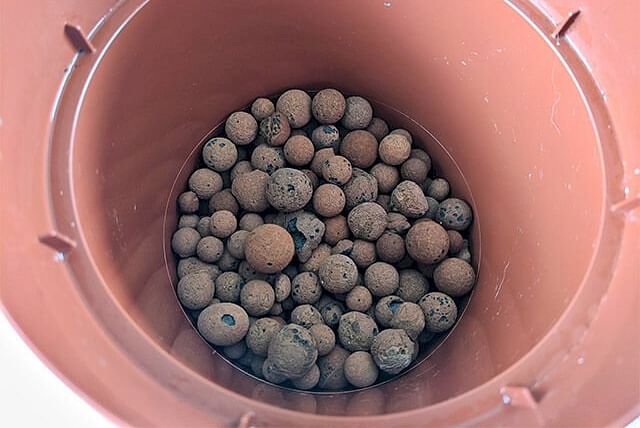
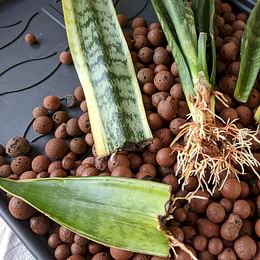
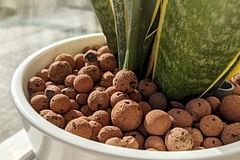
As we've seen before, standing water at the bottom of your pot can cause root rot. But if you create a base layer of non-organic material, there is less chance something starts to rot.
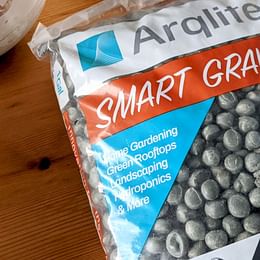
You can make these base layers with all types of things, but my favorites are Leca and Smart Gravel. These base layers to lift the soil off the bottom of your pot, so it's no longer standing in water.
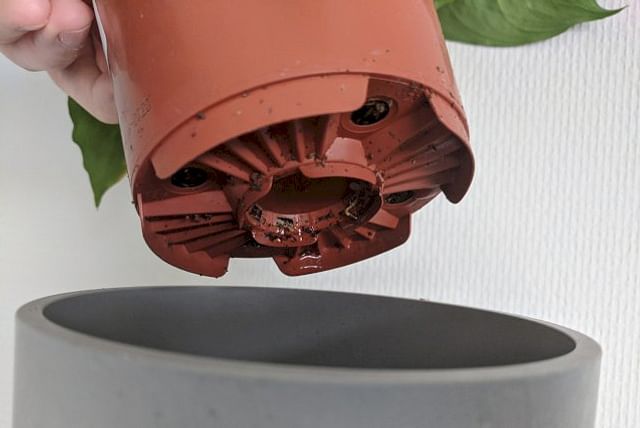
Use the plastic pot with holes your plant came in as a raised bottom
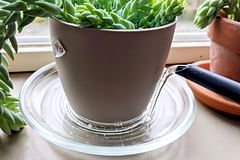
The second option you have is to use the plastic pot your plant came in. This pot has drainage holes at the bottom, so you can easily water it when you need to. You can put this plastic pot inside of a larger pot without a drainage hole, so you can still use your preferred type of pot whether it has drainage holes or not.
When you use the plastic pot with holes in the bottom, the pot without drainage holes it's standing in catches any of the excess moisture. The outer pot will catch the moisture, but also keep it away from the soil in the inner pot.
Mix some coarse materials in with the soil
Mixing in some chunky stuff like perlite or sand with your potting soil is a game-changer for your plants, especially if you're using pots without drainage holes. Let's keep it simple: those coarse materials help with drainage and make sure your plants get enough air. Perlite is fantastic because it's super lightweight and holds onto moisture without turning into a soggy mess. This means your roots are happier, getting the water and air they need without getting stuck in compacted soil.
For sand, go for the coarse kind because it helps water flow away from the roots, keeping them nice and dry. Skip the fine sand since it can turn into a mud pie and ruin your drainage. A good rule of thumb is to mix one part of coarse material with three parts potting soil, but feel free to adjust based on what your plants love.
NOTE: Mixing in coarse material in the soil is perfect for helping the moisture drain to the bottom of the pot, but since your pot doesn't have drainage hole, the moisture will stay there. This is a problem if it's a lot of moisture and can cause root rot, no matter how well your soil drains. So, make sure to water your plant lightly and not too often. This helps to prevent moisture from sitting at the bottom.
Common mistakes made with pots without drainage holes
Using pots without drainage holes can lead to a few issues that no plant parent wants to face! First, excess water can collect at the bottom, leading to soggy soil and root rot. The roots that are supposed to be thriving can start to rot instead, leaving your plant looking sad and droopy. Not only that, but without proper drainage, you might also notice an increase in mold or fungal growth, turning your beautiful pot into a less-than-pleasant sight.
Another common problem is that it can be tricky to gauge how much water your plants really need. Without drainage holes, it's hard to tell when the soil is too wet or too dry. You can always check by touching the top 2 inches of soil, but this takes time and practice! Plus, over time, the soil can become compacted, which makes it hard for the soil to hold onto moisture and nutrients for your plant.
How can you avoid these problems?
So, how do we prevent these issues? If you're set on using a pot without holes, you can get a bit creative! One popular trick, which we looked at earlier, is to add a layer of pebbles, Leca, or Smart gravel at the bottom. This allows excess water to collect at the bottom of the pot without drowning your plant's roots. Pair that with a good-quality potting mix that's lighter and well-draining, and you've got a recipe for success! Just keep in mind that you'll need to pay extra attention during watering, so you don't end up overdoing it.
Another option is to use self-watering pots! These gems come with a built-in reservoir that allows the plant to absorb water at its own pace, meaning you get to relax a little and your plant stays happy. Regardless of the method you choose, always check the moisture level in the soil before watering, and consider using a moisture meter if you're unsure.
How to choose the right pot with drainage holes?
When choosing a pot, size truly matters! Aim for a pot that's about 1-2 inches larger in diameter than your plant's root ball. This gives your plant just the right amount of room to grow without feeling cramped. A pot that's too small can stress the roots, while one that's too big might hold onto too much moisture, which isn't great for your plant's health. Also, keep in mind the height: plants with deep root systems often appreciate a deeper pot, while shallow-rooted plants are happy in more shallow options.
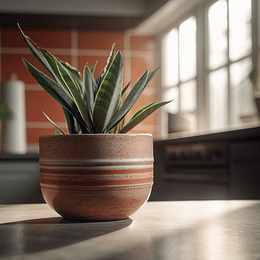
As for materials, you have plenty of choices! Terracotta and clay pots are super breathable, allowing moisture to evaporate and preventing over watering, perfect for those of us who might water our plants a little too much. On the flip side, plastic and ceramic pots can offer a more colorful or modern look and often come with drainage holes as well, making them a stylish yet functional option. So think about your plant's needs, where it'll live, and your personal style to find that perfect pot!
Are there specific shapes that work better for drainage?
While round pots are the classic go-to and usually do a great job, don't overlook squares or rectangles! Round pots promote even growth because they allow roots to spread out in all directions, making them ideal for many types of plants. However, square and rectangular pots can maximize space, making them a perfect choice for windowsills or crowded areas. They also just look super chic in your home decor!
When it comes to drainage, the key is finding a pot shape that helps the water flow to the drainage holes. Most pots with a tapered shape (they're narrower at the bottom) help ensure water drains out effectively. Just remember, it's important that your pot has drainage holes, or you can take a few extra steps to help keep the moisture away from the plant, to prevent root rot.
How can you cover drainage holes in pots?
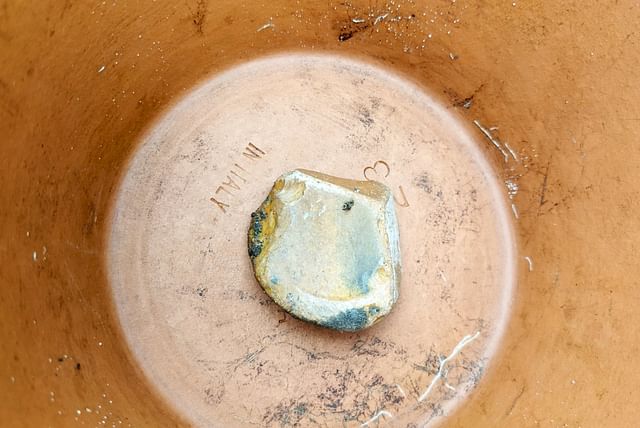
Drainage holes are great for the health of your plants, but they're also quite impractical. If you move the pot around quite a bit, you'll see soil falling out of the pot regularly. You can prevent this from happening by covering the hole with something.
The best ways to cover the drainage holes is to use something that doesn't hold onto moisture. Something like a piece of cloth will hold onto moisture and it's best you don't use this to cover the hold. A better option would be a rock or a piece of gardening sheet that allows moisture to flow through freely.
You'll notice right away that these covers still allow the moisture to drain, but won't let (a lot) of soil escape from the pot.
Now we know how to use a pot with and without a drainage hole, let's see which plants do well in a pot one and which do well in pots without one.
Which plants need a pot with drainage holes?
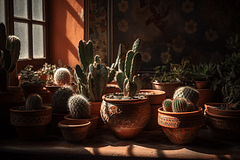
A lot of plant owners believe that a pot with a drainage hole has to be used with certain types of plants. Luckily, this is not necessarily true. As we've seen earlier in this guide, there are ways to get great drainage in pots without a drainage hole. Because of this, you can grow drought-loving plants in a pot with a drainage hole, but also in a pot without one. If you have a drought-loving plant and you want to grow it in a pot without a drainage hole, you can! You should make sure that you have a base layer of rocks, Leca, or Smart Gravel in your pot and you're ready to use that pot.
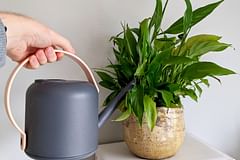
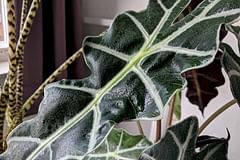
There are a few plants that love moisture a lot, so you don't have to add that base layer if you don't want to. Some of these plants are Peace Lilies or Spider plants. They love moisture and can absorb the moisture in the soil quickly enough to avoid serious problems, assuming that you have a pot that's properly sized for your plant.
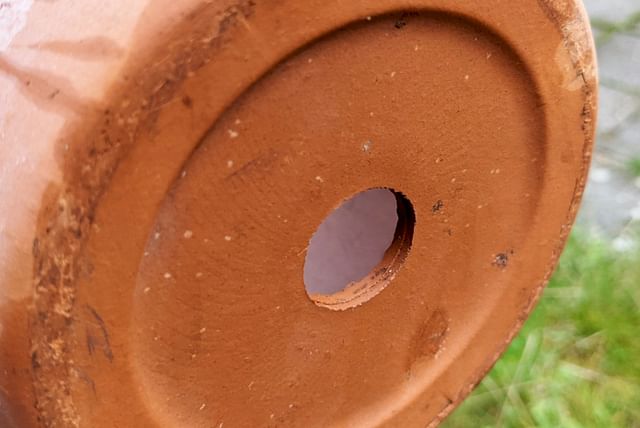
Is one drainage hole enough?
Your local gardening store probably sells a lot of pots with one drainage hole. You might wonder if that is enough to keep your plant happy. Generally, a single drainage hole in the middle of the pot is fine. These pots often have a flat bottom, which means that the moisture will evenly flow down towards the drainage hole. You can always carefully add more drainage holes if you want to, but it's not necessary for the plant to be happy.
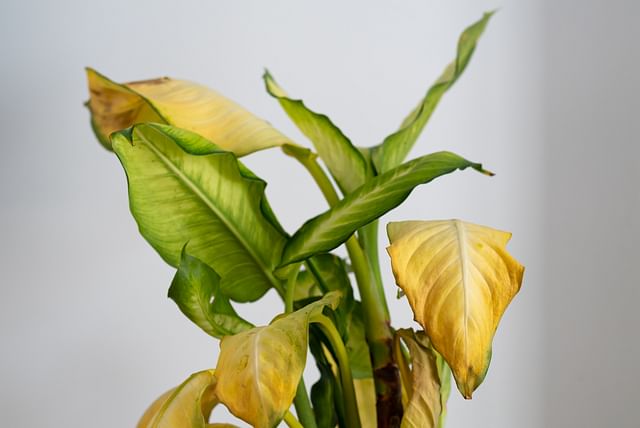
Signs of poor drainage or over watering

If your plant is dealing with poor drainage, it will definitely let you know! One of the first things you might notice is yellowing leaves, which often start at the bottom and work their way up. This yellowing happens because soggy roots can't deliver nutrients properly, leading to some serious distress for your plant. You might also see wilting leaves that feel soft to the touch; they look droopy and sad.
Another red flag is the presence of mold or fungus on the soil's surface. This mold loves damp conditions and can signal that your plant is growing in soil that's too wet. If you notice these signs, you should take some steps to improve the drainage of your soil and/or pot.
How can you tell if you are watering too much or too little?
Figuring out the right watering balance can feel like a tricky puzzle, but don't worry! One way to check if you're watering too much is to stick your finger about an inch into the soil. If it feels wet and mushy, that's a clear signal to slow down your watering! Overly soggy soil can lead to root rot, which can kill your plant. On the flip side, if the soil feels dry and crumbly all the way down, it's time to give your plant a drink.
Another handy trick is to pay attention to how your plant is behaving. If your plant is drooping, wilting, or has curling leaves, it might be a sign of under watering. While yellowing leaves or a general lack of vigor often point to over watering. Your plant's leaves are like little communication devices, so watching them closely can help you find that sweet spot in your watering routine.
How do you remove excess water from the pot?
If you spot water collecting at the bottom of your pot, don't panic! First things first, you need to act fast to prevent your plant from suffering. Carefully lift the pot and tip it slightly to pour out that excess water. This simple step helps to remove excess water from pots without drainage holes and protects the roots against root rot.
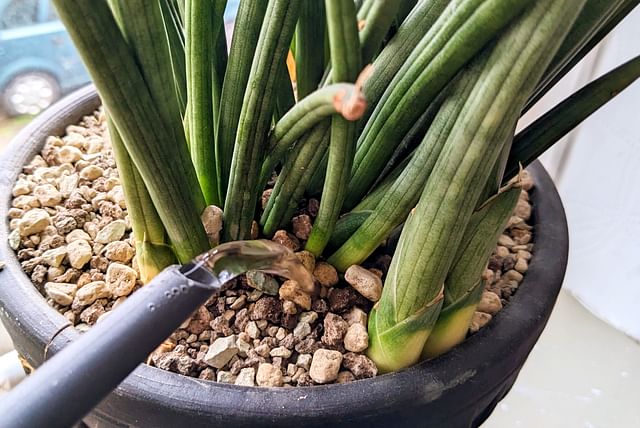
How do self-watering pots work?
Earlier, I mentioned you can use self-watering pots to water your plants as they need it. But how do they work? Let's find out!
Self-watering pots usually come with a built-in reservoir at the bottom, allowing your plant to sip water as needed. Here's how it goes: when you fill the reservoir, the soil absorbs moisture. The soil can only absorb so much of it, so there is no "excess moisture" left behind in the pot. This means that your plant gets to take in water at its own pace, minimizing the risk of over or under-watering.
Most self-watering pots also have a wicking system, which helps maintain the perfect moisture level in the soil. When the soil goes dry, it quickly sucks up water from the reservoir; when it's sufficiently moist, the pot stops the upward flow. It's a handy way to ensure your plants are well cared for, even when life gets busy. Plus, they often look stylish, giving your home that extra charm!
You can quite easily make these pots yourself as well, have a look at this video: DIY Self-watering system for pots with no drainage.
Seriously, try that method! Especially if you're planning on going on vacation for a few weeks. Normally I'm a little nervous to go away from more than 2 weeks, but by using the self-watering pots with a simple wick, you can water your plant perfectly for several weeks at a time. It's quite magical.
How do you water plants in pots with drainage holes?
The perfect amount of water really depends on the type of plant you have and its specific needs, but a general rule of thumb is to water until you see a little bit of moisture running out of the drainage holes (if you have them!). If the top inch of soil feels dry before your next scheduled watering, it's a sure sign that your plant is thirsty and ready for a drink!
And if you're wondering how often to water your plants, on average it's best to stick to a weekly watering schedule and adjust based on how quickly the soil dries out. During warmer months, you might find that your plants need more water, and less during colder periods.
When to repot plants based on drainage issues?
Knowing when to repot your plants is important for keeping them healthy for a long time, especially if they're struggling with drainage issues. If you start to notice that water sits on the surface of the soil for too long after watering, or if your plant's growth seems stunted, it could be a sign that your plant is rootbound or suffocating in compacted soil. You might also see roots poking out from the bottom of the pot or curling around the edges.
Keep an eye out for yellowing leaves, especially if they're your plant's leaves are also droopy. This can mean that the roots are not getting enough oxygen due to poor drainage. If you've checked all these signs and they seem familiar, it's time to consider repotting your plant into a fresh mix that promotes good drainage and gives those roots plenty of room to stretch!
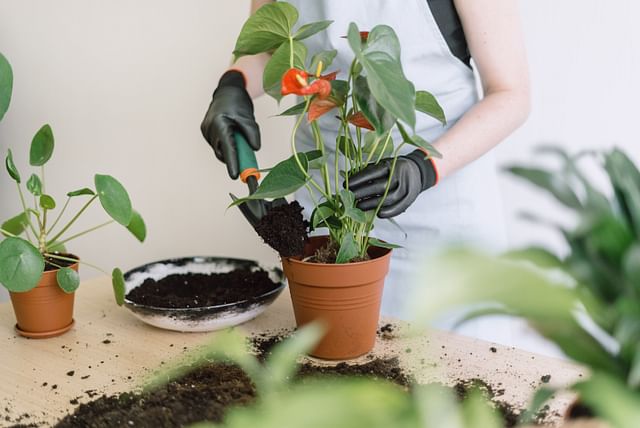
What steps should you take when repotting to improve drainage?
When you're ready to repot, make sure to gather your supplies: a slightly larger pot (ideally with drainage holes), fresh potting soil mixed with coarse materials like perlite or sand for improved drainage, and some tools to help with the process. First, gently remove your plant from its old pot by running a knife along the edges if it's stuck.
Once your plant is freed, check the roots and trim away any that look brown or mushy, as these could be signs of rot. Now, add a layer of your new soil mix to the bottom of the new pot, place your plant in, and fill around the sides with more of that lovely soil, ensuring it's not packed too tightly. Water it lightly to help settle the soil, and voila! You've given your plant a new home that promotes healthy growth and proper drainage. Just remember to keep an eye on it for the first few weeks as it adjusts to its fresh start!
Good drainage means healthy soil
Drainage holes are essential for keeping the soil healthy and happy because they allow excess water to escape, preventing buildup that can lead to soggy roots and root rot. When water can drain freely, it promotes a balance of moisture and air within the soil, where beneficial microorganisms can thrive.
These microorganisms play a crucial role in breaking down organic matter, helping to release nutrients that your plants need to grow strong. With good drainage, your soil remains fluffy and aerated, making it easier for roots to spread out and take in water and nutrients.
Conclusion
Drainage holes can be confusing for beginning plant owners because over watering plants is quite easy, so why would you get a pot that keeps excess water in the pot? Luckily, there are several ways you can give pots without a drainage hole a fair chance. If you use the plastic pot your plant came in and put that in the pot without drainage holes, you still have excellent drainage. You can also add a base layer of rocks, Leca, or Smart gravel at the bottom of the pot to keep the plant away from the excess moisture.
Pots with or without drainage holes are all great and can be used for all plants. Pots without drainage holes just need a few extra steps to work for any plant!
Thank you for reading this post! I hope it helps you to keep your plants healthy and beautiful! If you're looking for more guides on specific plants, you can always request a plant guide to get a guide for the plant you have trouble with.
Test your plant care knowledge
Quiz completed!
Want to learn more? Sign up for my newsletter to receive free tips in your inbox!
Sign up now!