Air plant care: A comprehensive guide for beginners
Discover how to care for air plants with ease! This comprehensive guide is specifically designed for beginners and covers everything from watering to sunlight exposure. After following this plant care guide, you'll be a master at taking care of an air plant.

Recently I've looked more into low-maintenance houseplants. Once your collection grows quite large, you simply don't have the time to look after all of them with the same care as you used to. This is when I found air plants!
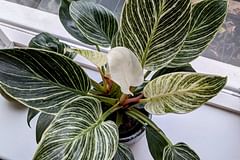
Air plants, also known as Tillandsias, are a popular type of houseplant because they're low-maintenance and their unique ability to thrive without needing any soil. This makes these plants a favorite among those who prefer a more unconventional approach to indoor gardening.
However, even though air plants are easy to care for, they still need some attention to thrive. In this guide, we'll look at all the essential aspects of air plant care, from watering to fertilization, so you can enjoy your air plant for years to come.
These are the topics we're going to look at:
Let's dive right into the plant care tips and let's help those air plants thrive!
What makes air plants special?
As I've already mentioned in the introductions, air plants don't need any soil to grow and thrive. These plants are epiphytes, meaning they grow without soil while attached to other plants. Air plants have specialized cells called trichomes that absorb water and nutrients directly from the air.
Other very popular epiphytes are Orchids and ferns. These plants can all grow against tree trunks and never get into contact with soil.
Choosing your air plant

Like most of my other plant care guides, I cover many species within the same genus in a single care guide. I'll do the same here, because the air plant, or the Tillandsia is a genus of plants that has 650 species, a little too many to individually look at with you. Luckily, the large majority of the types of air plants all require the same care.
Tillandsias are evergreen, perennial flowering plants in the family Bromeliaceae, native to the forests, mountains, and deserts of Central and South America, the southern United States, and the West Indies. They're a very diverse group of plants.
Let's look at some of the most popular types of air plants that you can consider getting:
- Tillandsia Ionantha: This is one of the most popular air plant species because it's quite small and has vibrant colors, making it a great choice for small terrariums or as a decorative piece.
- Tillandsia Xerographica: This plant is larger and has a more sculptural appearance, making it a great centerpiece for any room.
- Tillandsia Bulbosa: This air plant has a unique look, with curly leaves that give it a playful look. It can also produce bright pink and purple flowers.
These are just the most popular plants in this large group, but if you already have an air plant that's not one of these, you can still follow along with this guide. These types of plants generally have the same care requirements as the ones above.
Watering air plants
 Let's talk about watering an air plant! How do you water a plant that doesn't grow in soil? What and how do you water? Let's find out!
One of the most unique aspects of these plants is that they don't rely on soil for moisture. This makes their watering needs different from other houseplants that get water from the earth.
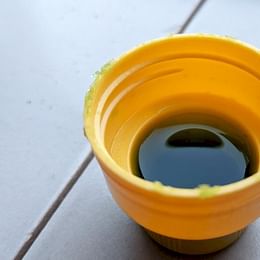
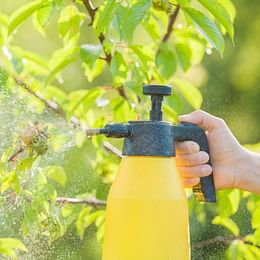
When it comes to watering air plants, you've got two very easy options: misting or soaking. Let's see how you water your air plants using these methods.
Misting
Misting is an easy and fun way to take care of your air plant! It involves using a spray bottle to give your plant a little bit of water. Smaller air plants, or those in hard-to-reach places around home can benefit from this easy method of care.
Here's what to do:
- Fill a spray bottle with room-temperature water.
- Hold the spray bottle about 6 inches from the air plant.
- Spray the air plant until it is fully saturated, being careful not to soak the leaves too much.
Soaking
Soaking is a great way to give your air plant an extra drink! All you need to do is find a shallow container and you can follow these simple steps:
- Fill a container, such as a bowl or sink with room-temperature water.
- Submerge the entire air plant in the water.
- Let the plant soak for 20-30 minutes.
- Remove the plant from the water and shake off any excess water.
How do you know when the air plant has soaked up enough water?
Without the soil, it's a little difficult to tell when your plant has had enough water. So here are some great ways to tell if your air plant has absorbed enough water.
- When your air plant is dry, it becomes lighter in color. When it has absorbed enough moisture, it'll turn greener. This is a good clue that your plant has absorbed enough water.
- If the leaves of your air plant feel firm, it'll have absorbed enough moisture.
- Some types of air plants will start to curl up when they're getting dry. When you water the plant, it'll start to uncurl again. This is also a good clue that your plant has absorbed enough moisture.
After you've watered your air plant, you can hang it upside down to allow any excess moisture to get away from your plant. This will prevent root rot and fungal infections.
As a general rule, air plants should be watered once per week during warmer months, and once every two weeks in cooler months. However, make sure to look at the signs your plant is showing you because it could dry out more or less quickly than these general guidelines.
Light requirements for air plants

Air plants are special when it comes to watering, but when it comes to sunlight exposure, they're very normal plants. Air plants prefer bright, indirect light. They can tolerate direct sunlight only in the early morning or late afternoon, but too much direct sunlight can cause the plant to dry out and die. If your air plant is outside, place it in a shaded area to avoid direct sunlight.
Temperature requirements for an air plant
Air plants are quite hands-off and they prove their tough plants when you look at their ideal temperature range: 10–32℃ (50 to 90℉). These plants can even withstand a light frost too! However, longer periods of colder temperatures may prove harmful, so it's best to try and avoid keeping this plant in freezing temperatures for too long.
Common pests on an air plant

Like many other plants, air plants can also be attacked by pests. These are the most common pests you can expect to see on your air plant:
Mealybugs
These are small, white, cottony insects that can be found in the crevices of your air plants. They suck the sap from the plants, which can lead to yellowing and wilting. If you notice mealybugs, you can remove them using a cotton swab dipped in rubbing alcohol.
Read more about Mealybugs in How to get rid of mealybugs on houseplants.
Scale
Scale insects are small, flat, and often look like part of the plant, making them difficult to spot. They can cause the plant to look sickly and discolored. Like mealybugs, they can be treated with rubbing alcohol.
Read more about Scale insects in How to get rid of scale insects on houseplants.
Aphids
These are small, soft-bodied insects that can cause damage by sucking the sap from air plants. They can be washed off with water or treated with insecticidal soap.
Read more about Aphids in How to get rid of aphids on houseplants.
Spider mites
These tiny pests can cause discoloration and speckling on the leaves. They can be difficult to see with the naked eye, but you might notice webbing on the plant. They can be treated with insecticidal soap or a miticide.
Read more about Spider mites in How to get rid of spider mites on your houseplants.
Fungus and rot
Overwatering or allowing water to sit in the crevices of the plant can lead to fungal infections and rot. This can cause the plant to become discolored and mushy. To prevent this, make sure to shake off any excess water after soaking your air plant and allow it to dry completely in a well-ventilated area.
Fertilizing air plants
Even though air plants don't need soil, they still need other kinds of nutrients! Fertilizing your air plants can help them grow even stronger. You don't have to fertilize your air plants for them to survive, but it may give them a growth boost.
If you choose to fertilize your air plant for an extra boost, you have the choice of 2 types of fertilizer:
- Air Plant Fertilizer: This type of fertilizer is specifically formulated for air plants and is available at most garden centers or online.
- Bromeliad Fertilizer: Bromeliad fertilizer is another option for air plants, as they are part of the bromeliad family. However, it's important to dilute the fertilizer to half-strength, as air plants are more sensitive than most other bromeliads.
Since the air plant doesn't grow in soil, fertilizing them will be a little different from what you might be used to. You can't use any slow-release fertilizer, because that will spread throughout the soil, so how do you fertilize this plant?
You can fertilize your air plant by following these simple steps:
- Dilute the fertilizer according to the instructions on the package.
- Use a spray bottle to mist the plant with the fertilizer, being careful not to oversaturate the leaves.
- Apply the fertilizer once per month during the growing season (typically spring and summer).
If you accidentally spray your plant too much, you can simply let the moisture drain away from the plant by gently shaking the plant or hanging it upside down.
Flowers on an air plant
If you've taken great care of your air plant for a while, it may start to grow flowers! An air plant blooms only once in its lifetime and will grow a beautiful flower. After growing this flower, the plant will produce offsets, or "pups," which can be separated from the mother plant once they've grown to about one-third the size of the parent.
After putting out these pups, the parent plant will die off. You can now grow the baby plants and repeat the whole process. So how do you separate the pup from the parent plant? Let's find out!
Propagating air plants
When the baby plant is the right size, you can remove it from the parent plant and propagate it. Removing the baby plant from the parent is easy. You can usually just twist them and pull them right off. This is very similar to propagating a succulent leaf.
If the baby plant is still quite attached to the parent plant, you can also use clean, sharp scissors to cut it off.
After removing the baby plant from the parent, let it dry for 2 days, so the wound can heal. After this, you can take care of it like you would for any adult air plant.
Displaying air plants

Now that we've looked at all the important parts of taking care of the air plant, let's have a look at some creative ways to display your air plants.
With air plants, you can display them in whatever way you prefer. Mount your air plant on a piece of driftwood or stones for an interesting look! Or creatively display your air plant in a terrarium to make a statement. And for the simpler option, simply place the air plant on the shelf to spruce it up.
Your air plant will be fine with most ways to display them, as long as you keep them away from direct sunlight or water.
Thank you for reading this post! I hope it helps you to keep your plants healthy and beautiful! If you're looking for more guides on specific plants, you can always request a plant guide to get a guide for the plant you have trouble with.
Test your plant care knowledge
Quiz completed!
Want to learn more? Sign up for my newsletter to receive free tips in your inbox!
Sign up now!