A comprehensive plant care guide for Dracaena Angolensis
Learn expert tips and techniques to ensure your Dracaena/Sansevieria thrives, all explained in simple language. Whether you're a beginner or experienced plant owner, this comprehensive guide will help you navigate the ins and outs of Dracaena Angolensis care. Let's help this amazing, low-maintenance plant thrive in your home!

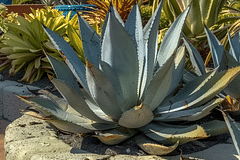
Dracaena Angolensis, also known as the Sansevieria cylindrica, cylindrical snake plant, African spear or spear sansevieria, and Saint Bárbara sword, is native to Africa, specifically Angola. This tough plant has a very unusual appearance and best of all, is incredibly easy to care for.
This plant doesn't just stand out in your house, it also has the amazing ability to improve the air quality in your living spaces. If you're looking for a great-looking plant that loves to be forgotten about, purifies the air, and is perfect for beginners, this plant is the one you want.
In this plant care guide, we're going to look at these topics:
Let's learn how to care for this tough plant!
Dracaena or Sansevieria?
The Dracaena Angolensis has a lot of different nicknames as we've discovered in the introduction. This always confuses me, so in case it also confuses you, let's clear up what this plant is called. Is it Dracaena or Sansevieria?
The answer lies in the botanic world. Dracaena Angolensis was earlier part of the Sansevieria family and used to be called "Sansevieria cylindrica". However, recent changes in plant classification have moved it to the Dracaena genus. This is why both names are technically correct, but newer plant care guides will refer to these plants as Dracaenas and only name Sansevieria because it's still a well-known name.
So it's a Dracaena now. Confusion cleared up. Let's learn how to take care of this plant!
Watering your Dracaena Angolensis

When you're taking care of plants, the most important thing to get right is watering. Watering your plant properly will help it thrive and watering it too much or too little will harm it. Let's break down watering your Dracaena in a few easy-to-follow steps to help you get it right. Don't worry, this plant is easy.
When to water your Dracaena Angolensis
Dracaena Angolensis doesn't like a lot of water. The best time to water this plant is when you see that the soil is completely dry. Normally, I'd suggest you stick your finger in the soil to find out if the soil is dry, but with plants like this, that like to completely dry out, I use a different strategy.
If you want to find out if the soil for your Dracaena Angolensis has completely dried out, pick up your plant and feel its weight. Soil that still has moisture in it is quite heavy, while dry soil is very light and you'll feel the difference instantly. This strategy takes a bit of practice, as you'll need to learn the weight of moist soil and compare it to dry soil. But in my experience, this is the easiest way to prevent overwatering.
On average, you should water this plant every 4-6 weeks throughout the year. In the summer this will be closer to once every 4 weeks and in the fall and winter, this will be closer to once every 6 weeks.
How to water your Dracaena Angolensis
The way you water your Dracaena Angolensis matters a lot. You should avoid watering the leaves directly, as this can lead to rot. Instead, water the soil directly. Pour water slowly until it comes out of the drainage hole at the bottom of the pot, and make sure the plant does not sit in standing water.
When the soil is bone dry and doesn't seem to absorb moisture, I suggest you try watering your plant from the bottom instead of watering it from the top. This allows even the driest soil to slowly absorb water.
Signs that you're overwatering
If you notice the leaves of your Dracaena Angolensis become yellow or brown or start to fall, it might be a sign of overwatering. Another sign could be a soggy or mushy base. If you notice any of these symptoms, cut back on the watering straight away.
This plant thrives when you forget about it, so if you find yourself watering this plant more than once per month, it's a good idea to start a houseplant calendar to help water this plant properly.
Sunlight for a Draceana Angolensis

Besides proper watering, all houseplants need some level of sunlight to photosynthesize and stay healthy. Let's explore the best sunlight conditions for this plant.
Proper sunlight exposure
Your Dracaena Angolensis craves bright sunlight exposure. A spot near a west-facing window will give it this bright, warm sunlight it loves to grow in. Like many other Dracaenas/Sansevierias, this plant does well in a lot of different sunlight exposure levels but does best when it gets 6-8 hours of bright sunlight every day.
Most plants that thrive in bright light still prefer bright, indirect sunlight, but I've had my Dracaena in a south-facing window with direct sunlight for the past 5 years and it's doing well. Its tough "skin" is very similar to that of succulents and cacti and can deal with the warmer harsh sun just fine.
Signs your plant is receiving too little sunlight
This plant thrives in bright sunlight. But if you don't have a spot available with such sunlight, you can place it in another location. However, keep in mind that in rare cases, this might result in under-exposure to sunlight and potentially harm your Dracaena. Some signs of insufficient sunlight include slowed growth and a pale green color. If your plant shows these signs, consider moving it to a sunnier spot in your home.
Adapting to different sunlight levels
We've just learned that the Dracaena can grow in a wide range of sunlight exposure, but moving it to a slightly darker spot should be done gradually. So don't panic if a super sun-lit spot isn't available in your home. Your plant can still thrive in the darker spots, just make sure to pay close attention to signs of under-exposure.
Understanding the perfect soil for your Dracaena Angolensis

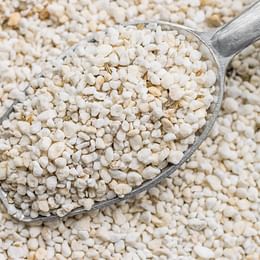
The Dracaena Angolensis, like any other plant, has specific soil requirements to thrive. These plants prefer a well-draining soil mix because they are susceptible to root rot if the soil holds too much water. If you're using standard potting soil, mix it with some sand or perlite to improve drainage.
Checking soil pH levels
Dracaena Angolensis plants enjoy a neutral to slightly acidic soil, with a pH anywhere from 6.0 to 7.5. You can purchase a soil test kit at most gardening stores if you're unsure about the pH level of your soil. Adjusting the pH of your soil may be necessary if its current level isn't in the optimal range.
Changing the soil composition for Dracaena Angolensis
If you need to change the composition of your soil to make it suitable for a Dracaena Angolensis, you have several options. Add some peat moss to increase the soil's acidity naturally. To improve the drainage, consider adding some perlite or sand into the soil mix.
Be sure to check your plant often to make sure that its soil requirements are being met. If you notice signs of overwatering, even if you water your plant only once per month, it's a good idea to improve drainage by adding perlite or coarse sand to the soil. This will drain excess moisture to the bottom of the pot more quickly.
Fertilizing a Dracaena Angolensis

If you want your Dracaena to grow, you need to provide it with additional nutrients. Proper fertilization is an important part of helping your plant grow throughout the year. Let's explore how, when, and why to feed your Dracaena Angolensis.
Why is fertilizer necessary for a Dracaena?
Just like us, plants need nutrients to stay healthy throughout the year. These nutrients help them to grow but also recover from pests or diseases. As your Dracaena Angolensis grows, it uses the nutrients that it can get from the soil. At some point, the soil doesn't contain enough nutrients for your plant to stay healthy, so you'll have to replenish it using fertilizers.
So what type of fertilizer do you need for this? Let's find out!
Choosing the right fertilizer
There are many different fertilizers available, but not all of them are suitable for your Dracaena Angolensis. This tough plant prefers a well-balanced water-soluble fertilizer. You can choose one with a balanced mix, like a 10-10-10 (these numbers represent the ratio of Nitrogen, Phosphorus, and Potassium). This way, your plant can have a well-rounded diet.
How often should you fertilize?
Like most succulents and cacti, Dracaena Angolensis thrives in nutrient-poor soil. It prefers growing in sandy soils that don't contain a lot of nutrients, so you won't have to fertilize it very often.
If you've picked up a well-balanced water-soluble fertilizer, you'll find instructions on how to use it on the label. Each fertilizer comes with specific instructions, so I can't tell you exactly how often you should apply your fertilizer.
However, from all the water-soluble fertilizers I've used myself, most wanted me to fertilize my plants weekly during the spring and summer. Let's use this as an example because we'll need to fertilize our Dracaena less than that. I fertilize my plant once every 4 weeks in the spring and summer.
You might notice that we should also water our Dracaena once every 3-4 weeks during this time of year. This makes remembering to fertilize easy: Always fertilize when you water your plant. This plant prefers to grow in nutrient-poor soil, so we don't want to give it too much and risk causing root burns.
In the dormant winter months, you can sit back and skip the feeding as the plant isn't actively growing and shouldn't be fertilized.
The fertilizing process
When it's time to fertilize your Dracaena, make sure to apply the water and fertilizer mixture directly to the soil and avoid getting it on the stems. If the soil is particularly dry, it could be good to water your plant from the bottom, as we've discovered in the earlier section about watering.
Common diseases and pests affecting Dracaena Angolensis

The tough Dracaena Angolensis is known to be very tough and resilient. But just like all living things, it can sometimes get sick or attract pests. This is normal, but luckily we can help! We'll look at some common issues you might face and how to deal with them. Let's dive in!
Spider mites
These tiny creatures, invisible to the naked eye, can cause serious harm to your snake plant. Their damage shows as speckles or patches of light discoloration on the leaves. To control spider mites:
- Wipe down leaves regularly.
- Keep humidity levels high as spider mites thrive in dry conditions.
Root rot
This is a common disease that usually happens when the plant is overwatered or planted in poorly draining soil. The symptoms are yellowing leaves, a mushy base of the stem, and a foul smell from the roots. If the plant has root rot:
- Cut away the rotten parts.
- Repot the plant in well-draining soil and avoid overwatering.
Scale insects
These pests appear as small, immobile bumps on leaves and stems. They suck plant juices causing leaf drop and stunted growth. If scale insects invade your plant:
- Remove the bugs manually or with an old toothbrush.
- Spray a soapy water solution or an organic insecticide on the plant.
Remember, prevention is a lot easier than treatment. Check on your plants regularly, and regularly wipe the stems to remove dust and water drops.
Propagating your Dracaena Angolensis

It's one thing to care for a Dracaena Angolensis, but wouldn't you like to grow more of this amazing plant? Propagation is your answer, and it's easier than you may think! I'm going to walk you through the optimal way to propagate your Dracaena Angolensis, and when to do it.
Techniques for propagating Dracaena Angolensis
Adding more Dracaena Angolensis to your plant family starts with two primary techniques: stem cuttings and division. Let's get into the details.
Stem cuttings
To start, select a healthy and thick stem from your plant. Cut about 4 to 6 inches from the stem, making sure to use sterilized pruning shears to avoid any disease spread. Then you should let the cutting dry for 2 days in a sunny and warm spot. This causes a callus to form, which will protect your cutting from diseases. After 2 days, you can plant your cutting in well-draining soil. Keep the soil moist and in a few weeks, new growth should start to appear.
Division

Propagation through division is easiest when you're repotting your plant. Carefully remove your Dracaena Angolensis from its current pot and lightly separate the root ball into two or three parts, each with its own stem and roots.
You'll quickly notice smaller plants are growing from a main plant. Cut these off with a sharp knife to minimize damage. After cutting the smaller plant from the larger parent plant, put it in its own pot and use fresh well-draining soil. You'll now have created a new plant that can survive on its own.
After putting the plant in a new pot, I usually wait for 1-2 days before watering, to give the cut mark near the roots a chance to heal. This will protect your plant against diseases.
When is the best time to propagate my Dracaena Angolensis?
The best time to propagate your Dracaena Angolensis is during the growing season in the spring and summer. During this time of year, the plant grows more quickly and has plenty of energy to recover quickly. If you propagate during this time, you'll give your new plants the best chance of success.
When to repot your Dracaena Angolensis

To figure out when it's time to repot your Dracaena, keep a close eye on its growth and its roots. If your plant looks like its growth has slowed down a lot in the growing season or if you see roots growing out from the drainage holes, then it's time to give your plant a bigger pot.
Choosing the right pot
When it comes to choosing a new pot for your plant, always go for one that's slightly larger than the current one, about 2-3 inches wider. Make sure your new pot has drainage holes to prevent water from staying behind in the pot after watering, as this plant doesn't like to stand in a puddle of water.
The repotting process

If you're wondering how to properly repot your Dracaena Angolensis, follow along!
First, gently take the plant out of its old pot. Just be careful not to harm the roots while doing it. If the plant is difficult to get out of the pot, give the pot a little tap or gently squeeze it to loosen the soil.
Next, add a layer of about 2.5 cm (1 inch) of fresh potting soil to the bottom of your new pot. Then, place your plant into its new pot. Fill the rest of the pot with soil, gently pressing to secure the plant in place and getting rid of air pockets in the soil.
Finally, give your plant a thorough watering to let the soil settle and remove more of the air pockets.
Thank you for reading this post! I hope it helps you to keep your plants healthy and beautiful! If you're looking for more guides on specific plants, you can always request a plant guide to get a guide for the plant you have trouble with.
Test your plant care knowledge
Quiz completed!
Want to learn more? Sign up for my newsletter to receive free tips in your inbox!
Sign up now!