How to propagate houseplants from cuttings
Learn how to propagate your favorite houseplants from cuttings with our simple and easy-to-follow guide. No prior experience or expensive equipment required. Grow your indoor garden with these expert tips!

Do you ever look at your houseplant collection and just wish you had more? Expand your houseplant collection without breaking the bank with propagating from cuttings! In this special plant guide, we're ready to unlock all of the secrets behind propagating houseplants from cuttings.
Can't get enough plants in your home? With propagating, you don't have to! This time-tested technique has helped gardeners in their own homes for years. To help you propagate your plants, I have compiled an easy step-by-step guide that will help you navigate the propagation process with ease.
These are the topics we're going to look at in this plant care guide:
Follow the tips in this guide and you'll be on the path to filling each corner of your home with plants!
What is plant propagation?
Plant propagation is the process of creating new plants from existing ones. It's a fun and simple way to turn one parent plant into multiple baby plants.
There are three main ways to propagate: planting seeds, dividing plants, and taking cuttings. In this plant care guide, we're going to focus on the easiest method: propagating your plants by taking cuttings.
Stem cuttings vs leaf cuttings
When you're taking a cutting of your plant, you can either take a leaf cutting or a stem cutting. Taking leaf cuttings and planting them is usually the best method for propagating succulents. You can read more about that process in How to propagate succulents: a step-by-step guide. Some plants can grow roots from a single leaf, but most other plants can only grow roots from stem cuttings.
Stem cuttings are, like the name suggests, cuttings or a part of the stem of the parent plant. These stem cuttings usually have 2-3 leaves on them and will grow roots out of the part that used to be connected to the parent plant. Stem cuttings are great for many plants, including the monstera.
Why propagate houseplants from cuttings?

Have you ever considered propagating houseplants from cuttings? It has so many benefits! For one, it's such an easy way to create a new plant without having to spend money on it. But it also allows you to replicate a plant genetically. Super convenient if you already have a favorite that you want to reproduce. Not only that, but it can be incredibly fulfilling too.
If the plants you're taking care of aren't doing so well, don't worry! Propagation is also a great way to give them new life and help them thrive. Using propagation, you can replicate a plant by taking cuttings from the healthy parts of it.
This way, whatever was causing the parent plant to die or struggle won't automatically be passed along to the new plant. It will start happy and healthy! And better yet, when you propagate successfully, in no time at all you'll have something on your hands that looks just like its parent, only much healthier.
Steps for propagating houseplants from cuttings

Now that you know why you might want to propagate your houseplants by taking cuttings, let's look at how we can turn your cutting into a thriving new plant. We'll explore everything from how to choose the best plant for propagation, to preparing your cuttings and nurturing them until they form roots. Trust me, there's nothing quite like the joy of watching a tiny cutting you've nurtured blossom into a vibrant, new plant. So let's get started!
Step 1: Choose a healthy plant and stem
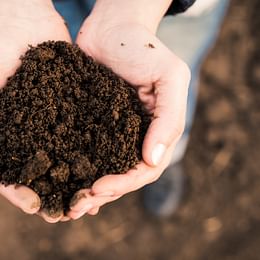
Choosing to propagate a houseplant from cuttings is an exciting adventure! It's important to choose a healthy plant for the best results. I like to look for plants with vibrant green leaves that have thick, sturdy stems.
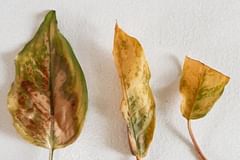
Signs of health would be one or two new leaves sprouting from the sides of tall stems as well! If the leaves are brown or yellow, this could mean there's something wrong, so it's probably best to pick another, healthier plant. It's worth it to take your time to select a healthy plant, as this will make your propagation process much easier.
Step 2: Choose the right cutting
So you've chosen a healthy plant to take a cutting off. Let's talk about which part of the plant you can use for your cutting.
Look for the strongest and healthiest stem; it should have at least one leaf node. If you're unsure what a leaf node is, that's ok! It's simply the point on a stem where a little leaf is growing. Leaf nodes are often a thicker bump in your plant's stem.
Those leaf nodes are what will grow the new roots on your cutting. This thicker part stores a lot of growth hormone which it'll need to grow the roots.
Step 3: Prepare the cutting

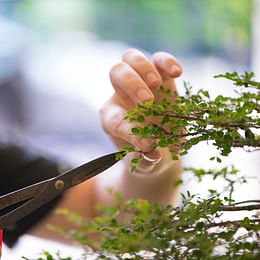
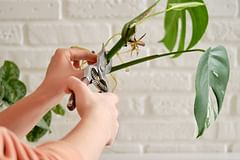
Now it's time to get your cutting ready for propagation! Grab a pair of clean and sharp scissors or gardening shears. Cut the stem just below the leaf node, so the leaf node is on the cutting. Make sure your cutting has at least 2-3 leaves.
Step 4: Remove lower leaves
Now it's time for the next step! Start by checking and removing any lower leaves off the stem. This might be hard since those leaves won't easily come off, but it's completely okay. You're just helping that cutting get the right start, and when you take them off, less energy is wasted trying to grow those leaves and your cutting can focus on growing the roots.
When you first start making new plants from cuttings, knowing which leaves to pluck off can be a bit confusing. I was always confused about what "lower leaves" meant, so what does it mean? Well, from my plant adventures, I've learned that you should remove any leaves that would end up under the water when you pop the stem in a jar. Let me tell you why this is important.
The stem can stay in the (clean) water for weeks and weeks without any problems. But the leaves? Not so much. If they're under the water, they can get soggy and start to rot. That's not good because it can lead to fungus problems that might make it very difficult to grow roots.
So, what's the golden rule here? Make sure the spot where the leaf connects to the stem, the leaf node, is not underwater. By doing that, you help stop any rot or fungus from starting and give your cutting the biggest chance of success when it comes to growing roots.
Step 5: Dip in rooting hormone (optional)
To increase the chances of successful growth and development, try dipping the end of the stem in a rooting hormone! This specialized powder contains a growth hormone specially designed to help stimulate root flexibility and development.
I have to admit that I've never done this myself, which is why I see this as an optional step in the propagation process. Some of my fellow plant educators swear by it and they've seen great results, so it's absolutely worth a try. Keep in mind, if you're using this growth hormone, you should always place your cutting straight into the soil and you can't use water propagation as your rooting method.
Step 6: Plant the cutting

So in this step, you have 2 options: plant your cutting in soil and let it root in there, or my personal favorite, put your cutting in a jar with some clean water. Whichever method you choose, the following steps will be identical.
When you choose to grow your cutting in soil, grab a small pot and plant your cutting in there. Carefully press the soil around the cutting to remove any air pockets and make sure your cutting is secure in its spot. Now water your cutting thoroughly. This helps the soil to settle around your cutting and will allow the cutting to absorb the nutrients directly from the soil. Don't fertilize your cutting yet though.
When you choose to grow your cutting in water, get a glass jar, fill it with clean room temperature water, and place your cutting in the jar. If any of the leaves are touching the water, make sure to remove them to prevent fungi from growing.
Step 7: Provide the right environment
When helping a cutting establish roots, the key is creating the right environment for them. You can never go wrong with a lot of light! Place the cutting in an area where it will get bright but indirect lighting. Giving them some extra warmth can't hurt either. Temperatures between 18℃ - 24℃ (65℉ - 75℉) are ideal for caring for your cutting.
When you grow your cutting in water, make sure to refresh your water once every 7-14 days, as the bright light will cause algae to form inside the glass jar. You can also surround the glass jar with material to keep the brightness inside the jar to a minimum. This will prevent algae to grow and you can keep the cuttings in the same water for a little longer. Still, make sure to refresh the water occasionally.
Step 8: Wait for roots to develop

Before you know it, you can watch the roots begin to grow along your cutting! It might take several weeks for these roots to grow. While you wait, it's important to keep the soil moist or the water fresh. Doing so prevents fungi and other types of rot.
Step 9: Transplant the new plant
If you've nurtured the cutting until it's got its roots, I'd say you're ready for the next stage! It's time to transplant your new plant into a (larger) pot. First, choose a pot that's slightly bigger than the one you have. Then carefully scoop the plant and its new roots out of the old pot or the jar of water. Then place the rooted cutting in the pot with fresh soil.
At this point, you'll have successfully propagated your parent plant and you'll have grown a completely new plant. Congratulations, you've done it!
Conclusion
I love having plants in my home and am surprised by how easy it is to make new plants from cuttings. Propagating houseplants is a simple and cost-effective way to add greenery to my home without expensive trips to the nursery. Propagating is also a great way to save plants that are not doing well or replace any ones that aren't thriving.
Thank you for reading this post! I hope it helps you to keep your plants healthy and beautiful! If you're looking for more guides on specific plants, you can always request a plant guide to get a guide for the plant you have trouble with.
Test your plant care knowledge
Quiz completed!
Want to learn more? Sign up for my newsletter to receive free tips in your inbox!
Sign up now!