Turning my Tiled Gray Backyard into a Green Garden
Turn your garden into a lush oasis without breaking the bank! You can start with something as easy as building a raised bed for all sorts of plants or swapping out those tiles for some lovely green grass. Let's dive into how you can start small and still make a big splash.

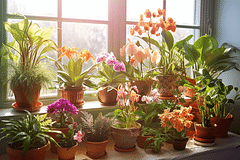
I have a little confession. While I have many green plants inside of my house, the garden is... not so green. If I'm honest, it's a bit of a sorry excuse for a garden. It's been bothering me for the longest time, but I was always too intimidated to do something about it.
I thought "It's going to be very expensive, it's a lot of work, and it won't look as good as I had imagined". But if you never do anything to change it, it'll never look good in the first place. My goal? A greener garden that doesn't break the bank. I want the garden to be a place that bees and butterflies can visit, a place that can keep me cool in the summer.
This is a bit of a different post than you might be used to from me, as I know nothing about plants outside. I'm a beginner in this story. I will make mistakes, but that will teach me what not to do in the future.
I will share the simple steps I took and the lessons I learned. I hope it encourages you to make your living places a little greener too, even if it starts small.
The steps to a greener garden

As I mentioned, I was very intimidated by doing any landscaping and garden work before starting this. I thought it was a lot of hard work. I'll burst your bubble, it was a lot of hard work. But I loved it. Here are the steps I took to transform my garden from a gray-tiled backyard to a place for nature.
Choosing the space

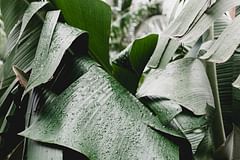
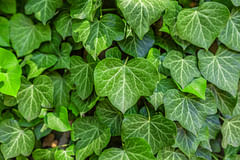
Choosing the space was very easy for me. I had a spot in my backyard that just looked terrible. It had a mount of heavy dense clay and somehow an English ivy managed to grow in it. Nothing else could grow there, except some moss. The place looked bad.
This spot receives direct sunlight in the morning, gets a little bit of sunlight in the afternoon, and is in the shade in the evening. This is important because it means I can't plant any sun-loving plants in that space. Bright flowers and grapes won't do well in this spot.
Building a raised bed

To start growing anything in this corner of my backyard, I'd have to build a raised bed. Why not grow directly in the ground? Because the ground where I live is made from heavy, dense clay. This is great for potatoes, but not for any of the plants I'd like to grow. So to give the plants a chance of success, I started building a raised bed for them.
The raised bed measured 220 x 80 x 20 centimeters (86 x 31 x 8 inches). I bought some cheap garden wood for this from the hardware store. It is treated to be used outdoors, so It'll stay good for a few years. I used the same wood for another planter a few years ago this is still in tip-top shape.
As an extra protection, I used some leftover construction plastic to line the sides of the raised bed and an anti-weeds sheet at the bottom of the bed. This sheet lets moisture through but blocks weeds.
But what about drainage in this clay? Well, that took a bit of effort.

Preparing the soil

As mentioned before, the ground in this area is mainly clay. To give the plants a better chance of growing, I had to give them something to grow in. This became a mixture of potting soil and perlite. The potting soil contains many nutrients and is supposed to drain moisture well. I added quite a lot of perlite to help with drainage, keep the soil light and airy throughout the year, and prevent too much compacting.
If you didn't know, I live in the Netherlands and it rains a lot. This is good for crops but also makes the soil compact quite quickly. Hopefully, the perlite helps to prevent too much compacting too quickly. But only time (and landscapers) will tell.
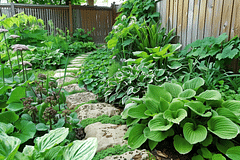
Planting

With the raised bed built and the soil prepared, it's time to start planting!
I have watched a lot, too much, social media content about companion planting and the best ways to grow herbs, fruits, and vegetables. What stood out to me was that most of these gardeners mix and match their types of plants. So most fruits and vegetable patches were right beside flowers.
I wanted to try to emulate this a little, so I got a few different types of plants and planted them kind of randomly in the raised bed. The idea was that there are flowers in between the herbs, fruits, and vegetables, so insects like bees aren't concentrated on one side of the raised bed. I don't know if this works (yet), but I will find out as soon as the sun starts to come out.
Replacing tiles with grass

With the raised bed finished, I was happy, but I wasn't done yet. I still hadn't removed enough gray tiles. So instead of calling this project a success, I removed a few more tiles right next to my tiny patch of grass and replaced it with a thick layer of soil.
After this, I added grass seed and waited for the rain to come down. The grass seed will take a few weeks to start coming through, but the hardest part is done: more tiles have been replaced with space for nature.
Tips if you want to make your garden greener

I'm still a beginner and won't claim to know what I'm doing, but I have already learned a few things that make it much easier for me, and hopefully for you too, to "just start". The goal isn't to be an expert at this, the goal is to get started and make your place greener.
Here are some things I recommend to help you get started with making your garden a little greener.
Start simple

You don't need to do everything at once. Gather basic tools and materials, then begin with a small project like a raised bed. If a raised bed is still too much, start with a single pot. Once you get started, you'll feel more confident that you can do it. Start with a pot, or a raised bed, or even replace a single tile with some soil and grass seed. No matter how small you start, it's a start.
This is what kept me from doing this years ago. I thought I had to do it all at once. Luckily, that's not the case.
Imperfection is okay
The second thing to embrace is that your garden won't immediately look like it does in your head. I'm sure you've already thought of your ideal outdoor space many times because I have too. It probably won't look like that, but it doesn't have to. Gardens grow and evolve. 10 tiny steps are still more steps than none at all.
Keep it affordable
Making your garden greener doesn't have to cost a lot of money. Don't have the budget for wood? Find some free pallets. Don't want to spend too much on plants? Ask if someone in your community is also redoing their garden and is getting rid of some plants. Don't have any tools? Pick some up from a local flea market or garage sale.
Money doesn't have to be a problem, because there are many free alternatives to improve your garden.
Learn by doing
You should give this a try, even if you think you don't have any skills. You'll probably find it's much easier than you think. Some things, like removing tiles, seem intimidating, but it's easy when you use a shovel.
Conclusion
Don't be intimidated to start your backyard transformation. Remember, every big change begins with the decision to try. Your first attempts may not go as you expected them to. Just start small. Many tiny steps still have more impact than never giving it a try.
Thank you for reading this post! I hope it helps you to keep your plants healthy and beautiful! If you're looking for more guides on specific plants, you can always request a plant guide to get a guide for the plant you have trouble with.
Test your plant care knowledge
Quiz completed!
Want to learn more? Sign up for my newsletter to receive free tips in your inbox!
Sign up now!